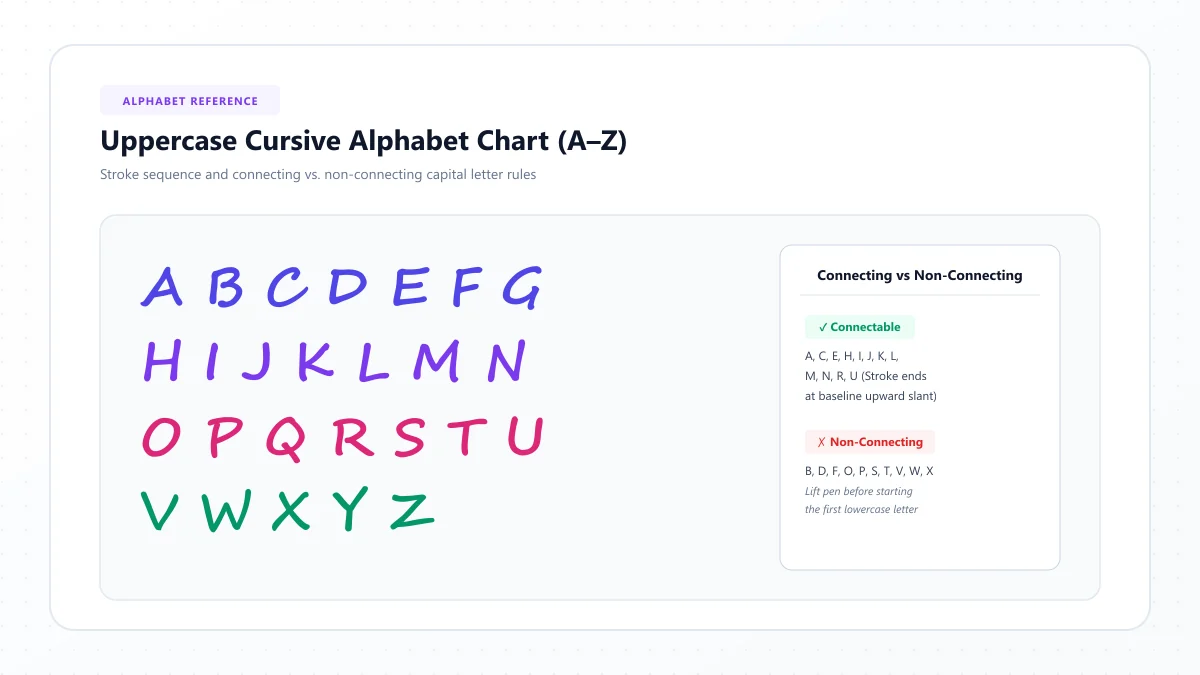
Have you ever tried writing a capital letter in cursive and wondered why it looks so different from the version you learned in print? You're not the only one. Some uppercase cursive letters are fairly familiar, while others have loops, curves, and flourishes that can make them difficult to recognize at first.
Letters like C and O are relatively easy to understand. But capital G, Q, and Z can look completely different depending on the handwriting style you're learning.
The good news is that cursive capital letters become easier when you break them into simple movements and practice them in small groups.
In this guide, you'll learn how to write uppercase cursive letters from A to Z, understand the differences between common handwriting styles, practice capital letters in names, and avoid mistakes that can make your writing difficult to read.
Whether you're a student learning cursive, an adult refreshing your handwriting, or someone who wants to write beautiful handwritten cards, this guide provides a practical place to start.
What Are Cursive Capital Letters?
Cursive capital letters are the uppercase forms of letters written in a flowing handwriting style. They're commonly used at the beginning of sentences, names, places, and other proper nouns.
Unlike lowercase cursive letters, which are often designed to connect smoothly within words, many uppercase letters have more independent or decorative shapes.
For example, a lowercase cursive l often uses a relatively simple ascending loop. An uppercase L, however, may have a large opening curve and a sweeping lower stroke.
The exact appearance depends on the handwriting system.
Traditional American cursive, Spencerian penmanship, the Palmer Method, and simplified modern cursive don't always form capital letters in the same way.
That's why you may encounter two different versions of a cursive capital letter that are both legitimate within their respective styles.
Cursive Capital Letters vs. Lowercase Letters
Feature | Uppercase cursive | Lowercase cursive |
|---|---|---|
Size | Usually reaches the capital-height guideline | Most letters occupy the middle writing zone |
Connections | Often begins separately from following letters | Usually connects within words |
Shape | May contain additional loops or decorative strokes | Typically designed for repeated, flowing writing |
Main purpose | Begins sentences and proper nouns | Forms most letters in ordinary words |
Common difficulty | Learning unfamiliar capital shapes | Maintaining smooth connections |
For beginners, the most important thing is to choose a consistent handwriting style and learn its basic movements.
How to Write Capital Letters in Cursive: 5 Simple Steps
Before working through the alphabet, familiarize yourself with the overall writing process.
Step 1: Prepare your handwriting paper
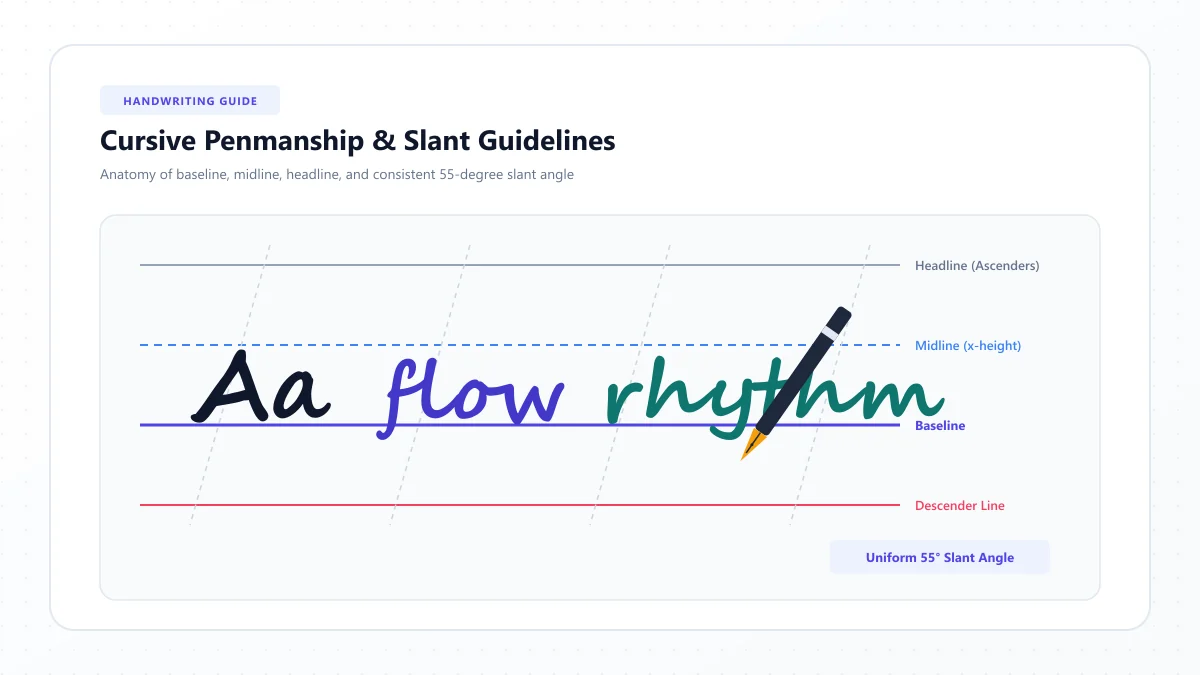
Use lined paper with a visible baseline and a top guideline.
A middle guideline can help you compare capital letters with lowercase letters.
Most capital letters extend higher than the main body of lowercase writing, although some traditional flourishes may go beyond the normal writing area.
Step 2: Choose one cursive handwriting style
Different educational systems teach different capital letterforms.
If you're learning cursive for school, follow the style your teacher or curriculum uses.
If you're learning independently, choose a readable style with consistent letter models.
Avoid switching between very different versions of the same capital while you're still practicing.
Step 3: Study the complete letter shape
Look at the letter before writing it.
Identify its main body, loops, curves, and finishing stroke.
Pay attention to its overall height and how it sits on the baseline.
Step 4: Follow the correct stroke sequence
Use a demonstrated model that shows the starting point, stroke direction, and pen lifts.
This is especially important for letters that look different from print, such as G, Q, and Z.
A decorative digital cursive character can show an approximate appearance, but it cannot tell you how the pen should move.
Step 5: Practice the letter in a real word
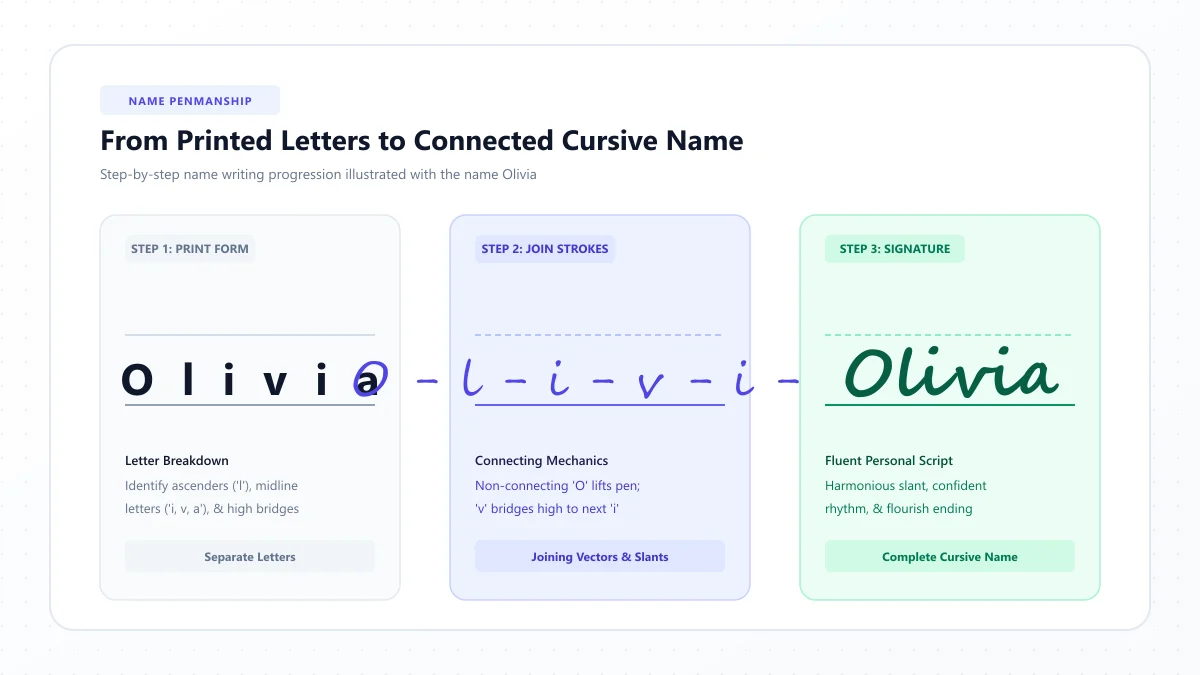
After writing the uppercase letter individually, try using it at the beginning of a name.
For example:
- A — Alice
- B — Benjamin
- C — Charlotte
- D — Daniel
This helps you understand how uppercase cursive works alongside lowercase letters.
For a full reference, explore our Cursive Alphabet Chart.
Cursive Capital Letters A–Z: Complete Reference Chart
The following table lists all 26 uppercase cursive letters with digital script-style examples, a main formation feature, and a practice word.
The decorative characters are visual references, not standardized handwritten models. Actual handwritten capitals may look different depending on the cursive style, particularly G, I, Q, and Z.
Capital letter | Digital script example | Main feature to practice | Example |
|---|---|---|---|
A | 𝒜 | Large oval or rising capital structure | Alice |
B | ℬ | Tall stem and rounded sections | Benjamin |
C | 𝒞 | Broad, open curve | Charlotte |
D | 𝒟 | Tall stem and sweeping rounded body | Daniel |
E | ℰ | Curved or looped capital structure | Emily |
F | ℱ | Tall body and upper finishing strokes | Fiona |
G | 𝒢 | Broad curve and distinctive lower finish | Grace |
H | ℋ | Tall strokes and connecting cross-movement | Hannah |
I | ℐ | Upright or curved capital body | Isabella |
J | 𝒥 | Long descending curve | James |
K | 𝒦 | Tall stem and branching arms | Katherine |
L | ℒ | Large opening loop and lower sweep | Lily |
M | ℳ | Repeated arches or sloping strokes | Michael |
N | 𝒩 | Balanced rising and descending movements | Noah |
O | 𝒪 | Large oval with a finishing flourish | Olivia |
P | 𝒫 | Tall stem and upper rounded section | Peter |
Q | 𝒬 | Rounded or numeral-like traditional form | Quinn |
R | ℛ | Rounded upper section and diagonal leg | Rebecca |
S | 𝒮 | Flowing upper and lower curves | Sophia |
T | 𝒯 | Tall body and upper cross movement | Thomas |
U | 𝒰 | Broad rounded lower curve | Ursula |
V | 𝒱 | Controlled downward and upward movement | Victoria |
W | 𝒲 | Repeated angled or rounded movements | William |
X | 𝒳 | Two intersecting movements | Xavier |
Y | 𝒴 | Upper branches and a descending stem | Yasmin |
Z | 𝒵 | Distinctive diagonal or looped construction | Zoe |
Use the table to identify letters and select practice words. For detailed uppercase and lowercase models, browse our A–Z Cursive Letter Guides.
How to Write Every Cursive Capital Letter A–Z
Each letter below includes a practical formation sequence and a word to practice.
These instructions describe common cursive movements, not one universal stroke order. Because school handwriting methods vary, use a matching handwritten model to confirm exactly where to start and when to lift your pen.
A — How to Write Capital A in Cursive
Capital A may have a familiar rising structure or a rounded, looped body, depending on the cursive style.
Practice steps:
- Study whether your chosen model begins with an oval or an upward capital stroke.
- Form the main body to full capital height.
- Complete the downward or closing movement.
- Finish with the appropriate small curve or connecting stroke.
Practice the names Anna, Andrew, and Alice.
Keep the main shape balanced so the capital remains recognizable.
B — How to Write Capital B in Cursive
Uppercase cursive B commonly contains a tall main stroke and two rounded sections.
Practice steps:
- Form the tall principal stroke.
- Create the upper rounded section using the direction shown in your model.
- Form the broader lower section.
- Complete the finishing stroke without crowding the two curves.
Practice B, B, and B.
Avoid making the lower section so large that the letter appears unbalanced.
C — How to Write Capital C in Cursive
Capital C is a good letter for beginners because many cursive versions retain the familiar open C shape.
Practice steps:
- Begin near the upper portion of the writing space.
- Sweep into a broad opening curve.
- Continue around toward the lower section.
- Finish with the opening clearly visible on the right.
Practice C, C, and C.
Keep the curve open rather than closing it into an O.
D — How to Write Capital D in Cursive
Capital D commonly combines a tall structure with a broad rounded curve.
Practice steps:
- Establish the main vertical or curved stem.
- Form the rounded body using a smooth, controlled movement.
- Bring the lower curve toward the baseline.
- Complete any finishing loop required by your style.
Practice D, D, and D.
Keep the rounded body proportional to the main stem.
E — How to Write Capital E in Cursive
Uppercase E often contains rounded movements or loops rather than the three straight horizontal strokes of printed E.
Practice steps:
- Observe the upper curve in your letter model.
- Form the top portion smoothly.
- Continue into the central and lower curves.
- Complete the final flourish without closing the open sections.
Practice E, E, and E.
Pay attention to the spaces inside the letter so the form remains readable.
F — How to Write Capital F in Cursive
Capital F can vary considerably. Some versions have a decorative upper stroke, while others use a simpler tall structure.
Practice steps:
- Form the upper portion of the letter.
- Establish the main vertical body.
- Add the cross-stroke or finishing movement according to your selected model.
- Check that the result is distinguishable from a capital T.
Practice F, F, and F.
Avoid adding extra flourishes before mastering the basic shape.
G — How to Write Capital G in Cursive
Capital G is one of the more distinctive uppercase cursive letters.
Some styles use a large, rounded opening and a lower return stroke. Others have more elaborate forms.
Practice steps:
- Study the full model carefully before writing.
- Begin with the upper curved movement.
- Shape the broad body of the capital.
- Complete the lower return, stem, or flourish required by that style.
Practice G, G, and G.
Keep the lower section recognizable rather than turning it into an uncontrolled loop.
H — How to Write Capital H in Cursive
Capital H commonly uses two tall structural movements linked by a connecting stroke.
Practice steps:
- Form the first tall section.
- Continue or lift the pen according to your model.
- Form the second main section.
- Add the connecting or cross movement.
Practice H, H, and H.
Try to keep both tall sections balanced.
I — How to Write Capital I in Cursive
Uppercase cursive I may look like a simple upright curved form, or it may have additional loops depending on the method.
Practice steps:
- Study how your handwriting model distinguishes I from J.
- Form the principal capital stroke.
- Complete the upper or lower finishing curve.
- Check that the capital remains clear beside lowercase letters.
Practice I, I, and I.
Because capital I and J can appear similar in some scripts, follow your chosen model consistently.
J — How to Write Capital J in Cursive
Capital J often includes a tall upper form followed by a descending stroke.
Practice steps:
- Form the opening capital movement.
- Continue down through the main stem.
- Extend the lower curve or loop beneath the baseline if required.
- Complete the return stroke neatly.
Practice J, J, and J.
Keep the descending section narrow enough to avoid touching the next line of writing.
K — How to Write Capital K in Cursive
Capital K is usually built around a tall stem with upper and lower branching movements.
Practice steps:
- Form the main tall stroke.
- Add the upper branch or loop.
- Form the lower extending movement.
- Finish with enough separation for the letter to remain recognizable.
Practice K, K, and K.
Be careful not to crowd the branching strokes.
L — How to Write Capital L in Cursive
Capital L is a popular decorative capital because its broad upper loop and lower sweep can look especially graceful.
Practice steps:
- Begin with the opening upper curve or loop.
- Form the long descending movement.
- Sweep across the lower writing area.
- Finish without extending the flourish too far into the next letter.
Practice L, L, and L.
Make the capital recognizable before experimenting with elaborate flourishes.
M — How to Write Capital M in Cursive
Capital M often uses a sequence of rising and descending movements.
Practice steps:
- Begin with the opening capital stroke.
- Create the first major arch or diagonal.
- Add the remaining structural movements.
- Finish with a balanced exit.
Practice M, M, and M.
Keep the repeated sections consistent so M doesn't resemble N.
N — How to Write Capital N in Cursive
Capital N resembles M in some cursive styles, but generally has fewer major structural movements.
Practice steps:
- Create the opening upright or curved stroke.
- Form the main descending and rising movement.
- Complete the final stroke.
- Check that the letter remains distinct from M.
Practice N, N, and N.
Avoid adding an extra arch that changes the letter's identity.
O — How to Write Capital O in Cursive
Capital O is based on a large oval and is useful for practicing controlled rounded movements.
Practice steps:
- Begin near the upper writing line.
- Form a broad oval.
- Close or nearly close the shape according to your model.
- Finish with the appropriate small loop or tail.
Practice O, O, and O.
Try to keep the oval smooth and evenly proportioned.
P — How to Write Capital P in Cursive
Capital P commonly consists of a tall main stroke and a rounded upper section.
Practice steps:
- Form the tall stem.
- Create the upper rounded body.
- Return toward the stem as shown in your model.
- Finish with a controlled ending stroke.
Practice P, P, and P.
Keep the rounded upper section clear without making it excessively large.
Q — How to Write Capital Q in Cursive
Capital Q deserves special attention because its appearance varies substantially.
Some traditional American cursive forms resemble the number 2. Other forms resemble a large cursive O with a distinctive tail.
Practice steps for an oval-based version:
- Begin with a broad upper oval movement.
- Continue around to form the main body.
- Complete the oval.
- Add the distinguishing lower tail or flourish.
For a traditional numeral-like Q, use a specific instructional model rather than adapting the oval version.
Practice Q, Q, and Q.
The most important detail is making the Q recognizable within the style you've chosen.
R — How to Write Capital R in Cursive
Capital R commonly includes a tall stem, a rounded upper section, and a diagonal finishing leg.
Practice steps:
- Form the tall principal movement.
- Create the upper rounded portion.
- Return toward the central area of the letter.
- Extend the lower diagonal leg.
Practice R, R, and R.
Make the lower leg clear enough to distinguish R from P.
S — How to Write Capital S in Cursive
Capital S uses flowing curves and can become decorative without requiring many extra strokes.
Practice steps:
- Begin with the upper curve.
- Sweep into the central bend.
- Continue into the lower curve.
- Finish with a balanced ending movement.
Practice S, S, and S.
Avoid tightening the middle so much that the letter becomes difficult to recognize.
T — How to Write Capital T in Cursive
Capital T often contains a tall main stroke and a broad upper finishing movement.
Practice steps:
- Form the main upright or slightly curved stroke.
- Complete the upper cross movement as your model directs.
- Add any lower finish needed for the style.
- Compare the result with your cursive F.
Practice T, T, and T.
Keep the capital clear before adding ornamental loops.
U — How to Write Capital U in Cursive
Capital U is useful for practicing smooth descending and rising movements.
Practice steps:
- Begin near the upper writing line.
- Move downward into a broad, rounded lower turn.
- Rise toward the capital height.
- Finish with the appropriate terminal stroke.
Practice U, U, and U.
Keep the bottom rounded rather than making it into a sharp V.
V — How to Write Capital V in Cursive
Capital V generally keeps a recognizable downward-and-upward structure, although the corners may be rounded.
Practice steps:
- Begin with the opening upper movement.
- Descend toward the baseline.
- Change direction smoothly.
- Rise and finish the capital.
Practice V, V, and V.
Aim for a clear central turn.
W — How to Write Capital W in Cursive
Capital W extends the movement pattern of V with an additional descending and rising section.
Practice steps:
- Begin the first downward movement.
- Rise from the first lower turn.
- Form the second lower turn.
- Complete the final rising or finishing stroke.
Practice W, W, and W.
Keep the two lower sections reasonably balanced.
X — How to Write Capital X in Cursive
Capital X is distinctive because many versions use crossing strokes rather than one uninterrupted movement.
Practice steps:
- Form the first diagonal or curved stroke.
- Lift the pen if your model requires it.
- Add the intersecting stroke.
- Check that the crossing point is balanced.
Practice X, X, and X.
The crossing should be clear without producing a dense knot in the middle.
Y — How to Write Capital Y in Cursive
Capital Y usually contains upper branching movements and a descending or sweeping finishing stroke.
Practice steps:
- Form the first upper branch.
- Create the second branch or upper curve.
- Continue into the descending stem.
- Finish with the appropriate tail or return stroke.
Practice Y, Y, and Y.
Keep the upper portion balanced with the lower movement.
Z — How to Write Capital Z in Cursive
Capital Z may look very different across handwriting traditions.
Some versions retain a recognizable Z structure. Others use large loops and extended lower strokes.
Practice steps:
- Study the particular Z model you're learning.
- Form its upper opening or horizontal movement.
- Continue through the central diagonal or curved body.
- Complete the bottom section or loop as demonstrated.
Practice Z, Z, and Z.
Avoid mixing different traditional forms during the same practice session.
Which Cursive Capital Letters Are the Hardest?
Some uppercase letters are difficult because their cursive shapes differ substantially from familiar printed forms.
Four letters often deserve additional practice.
Capital G
The upper and lower sections can be difficult to balance. Practice the main shape before adding any decorative finishing strokes.
Capital Q
Traditional versions may look like the number 2, while more modern versions can resemble O with a tail.
Choose the form appropriate to your handwriting system.
Capital Z
Looped capital Z can look unfamiliar to readers accustomed to print.
Practice it slowly using a reliable handwritten reference.
Capital F
Decorative capital F may resemble other tall capitals.
Pay particular attention to its distinguishing upper and cross-strokes.
If one of these letters is challenging, practice it separately before including it in a complete name.
How to Connect Capital Cursive Letters to Lowercase Letters
One of the most common beginner questions is whether uppercase cursive letters must connect to the next letter.
The answer depends on the handwriting style and capital form.
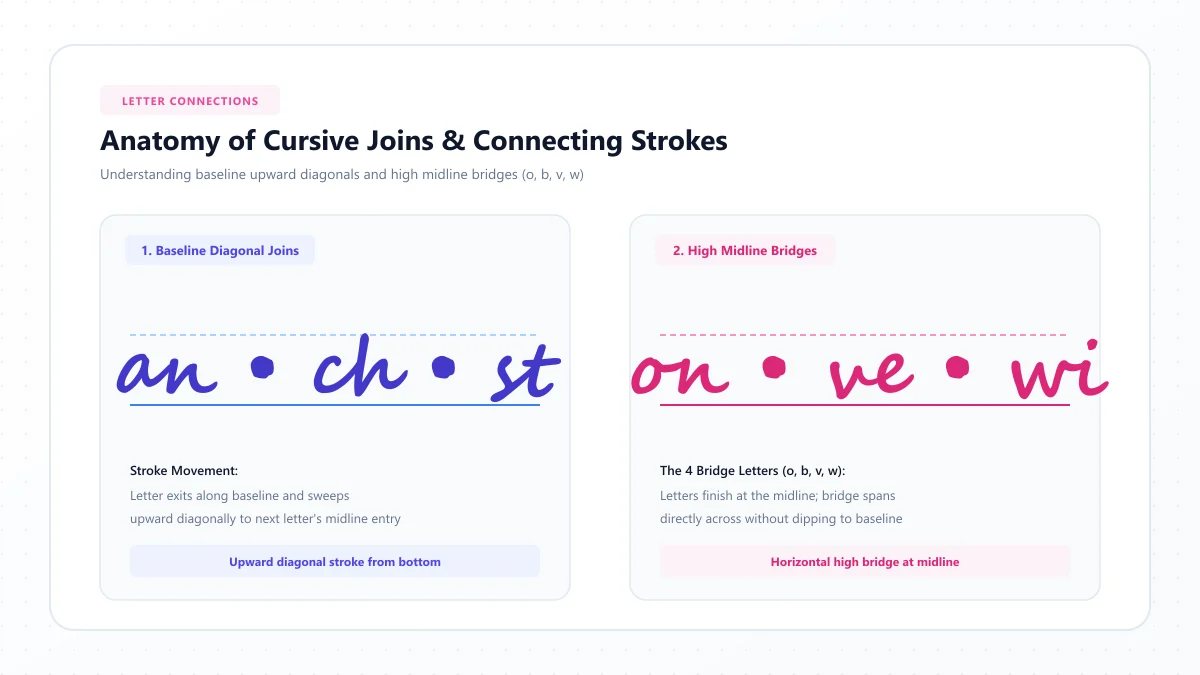
Many traditional school cursive capitals are written separately from the lowercase letter that follows. Other systems use capitals with connecting exit strokes.
For example, when writing Al, you may finish the uppercase A, lift the pen, and begin the lowercase l according to your chosen model.
In a different script, the capital may include a natural connecting stroke.
Neither approach should be treated as universally correct for every cursive system.
Practice with names
Try writing these names slowly:
- Alice
- Benjamin
- Charlotte
- Daniel
- Emma
- Grace
- Hannah
- Isabella
- James
- Katherine
Concentrate on keeping the capital distinct while allowing the rest of the word to flow naturally.
Common Mistakes When Writing Uppercase Cursive Letters
Making every capital too decorative
Large flourishes can make letters harder to read.
Fix: Master the basic letter structure before adding ornamentation.
Using inconsistent capital heights
If one capital is much taller than the next, handwriting can look uneven.
Fix: Use a consistent top guideline for ordinary writing.
Mixing unrelated cursive styles
A traditional Palmer Q alongside heavily stylized calligraphy capitals may look inconsistent.
Fix: Choose one primary handwriting style while learning.
Forcing every capital to connect
Not all capitals have natural connections to the next letter.
Fix: Follow the joining conventions of your chosen model.
Practicing letters without words
Writing rows of capitals helps with individual shapes but doesn't teach how they work in real handwriting.
Fix: Practice familiar names and complete sentences.
A 7-Day Uppercase Cursive Practice Plan
You don't have to master all 26 letters in one session.
Use the following routine as a flexible starting point.
Day | Letters | Practice activity |
|---|---|---|
1 | A, C, O, Q | Practice broad ovals and opening curves |
2 | B, D, P, R | Practice stems and rounded sections |
3 | E, F, H, I, J | Focus on tall capitals and finishing strokes |
4 | K, L, T, X | Practice branches, crossings, and sweeping strokes |
5 | M, N, U, V, W | Practice repeated rises and descents |
6 | G, S, Y, Z | Practice distinctive capital shapes |
7 | Full A–Z review | Write names, sentences, and difficult letters |
Aim for a short, comfortable practice session. You can spend longer on unfamiliar letters and repeat a day whenever needed.
The purpose is to make progress, not to finish the alphabet as quickly as possible.
Uppercase Cursive Practice Words and Sentences
Once you've practiced individual capitals, begin writing complete words and sentences.
Names for capital letter practice
Alice, Bella, Charlotte, David, Emily, Fiona, Grace, Hannah, Isaac, Julia, Kevin, Lily, Michael, Noah, Olivia, Peter, Quinn, Rachel, Sophia, Thomas, Ursula, Victoria, William, Xavier, Yasmin, Zoe.
These names cover every capital letter from A to Z.
Beginner practice sentences
- Alice and Ben visited the park.
- Charlotte wrote a beautiful letter.
- David and Emma enjoy reading.
- Grace sent a note to Hannah.
- James lives near Victoria Park.
- Olivia wrote a card for Quinn.
- Sophia and Thomas practiced handwriting.
- William met Xavier on Monday.
When writing each sentence, check that the initial capital is recognizable and proportionate to the lowercase letters that follow.
How to Practice Cursive Capital Letters at Home
You only need basic materials to develop a useful practice routine.
Start with lined paper, a comfortable pen or pencil, and a reliable uppercase cursive model.
Practice one capital several times, then write two or three names beginning with that letter.
Afterward, use the same capital in a sentence.
If you find that the shape becomes less recognizable while writing a word, return to the individual capital and review its formation.
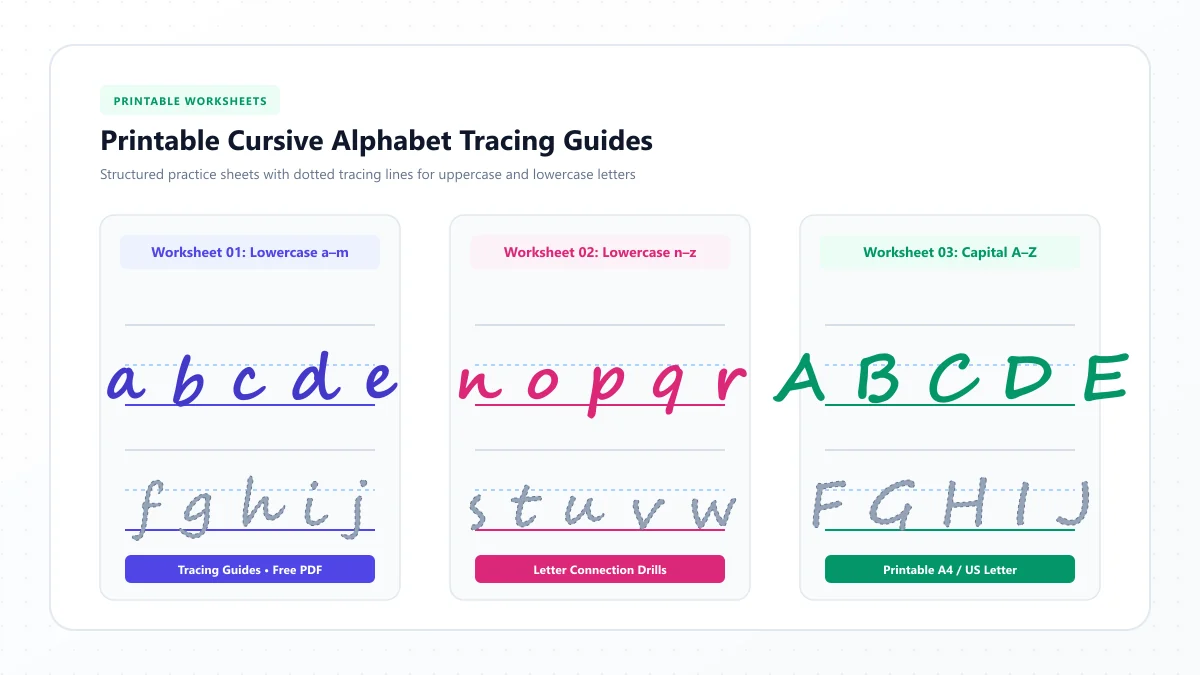
For printable exercises, use our separate worksheets resource.
You can also explore the Cursive Letters Directory to review individual uppercase and lowercase examples.
Cursive Capital Letters for Kids and Adults
Uppercase cursive practice can be useful at different ages.
Children may benefit from clearly marked handwriting guidelines and teacher-led demonstrations, especially when first learning unfamiliar capital forms.
Adults may prefer practicing names, greetings, or short personal notes.
The main principles remain similar: choose a consistent model, learn the movements, write at a comfortable pace, and review the finished result.
There's no requirement to master decorative capitals before using cursive in everyday writing.
Readable, well-proportioned letters are a practical starting point.
Frequently Asked Questions
How do you write capital letters in cursive?
Start by choosing a consistent cursive handwriting model. Study the capital's basic shape and stroke direction, practice it on lined paper, and then write it at the beginning of names and sentences.
Are all 26 cursive capital letters different from print?
No. Some capitals, such as C and O, resemble familiar printed forms. Others, particularly traditional G, Q, and Z, can look substantially different.
Do capital cursive letters connect to lowercase letters?
Sometimes. Many traditional cursive capitals are written separately, while others include strokes that can connect to lowercase letters. The correct approach depends on the handwriting method.
Why does a cursive capital Q look like the number 2?
Certain traditional American cursive styles use a numeral-like uppercase Q. Other styles use a rounded capital Q with a distinguishing tail.
What is the easiest cursive capital letter?
This varies by learner, but capitals such as C and O are often approachable because their broad curved shapes resemble printed letters.
What are the hardest uppercase cursive letters?
Capital G, Q, and Z are commonly challenging because their traditional cursive shapes can look unfamiliar. Decorative forms of F and other capitals may also require additional practice.
Can adults learn uppercase cursive handwriting?
Yes. Adults can learn or improve capital cursive letters through guided letter models, focused practice, and meaningful words and sentences.
Are uppercase cursive letters the same in every country?
No. Handwriting traditions, school curricula, and historical penmanship systems use different letter shapes and joining conventions.
Is cursive the same as calligraphy?
No. Cursive is primarily a handwriting style, while calligraphy emphasizes the deliberate visual design of letterforms. Some decorative scripts share features with both.
Can I copy and paste cursive capital letters online?
Yes. Digital script-style Unicode characters can be copied for decorative text. However, they are not equivalent to learning the physical strokes used in handwritten cursive.
You can explore them using our Cursive Letter Generator.
Final Thoughts
Learning cursive capital letters A–Z becomes easier when you focus on understanding their shapes rather than memorizing decorative patterns.
Start with familiar curved capitals such as C and O, progress to letters with taller structures, and spend additional time on distinctive forms such as G, Q, and Z.
Most importantly, use your new capitals in actual writing. Names, greetings, and short sentences help connect individual letter practice to everyday handwriting.
For more support, explore our Cursive Alphabet Chart, visit the A–Z Cursive Letters Directory, or try the Cursive Letter Generator for digital script-style examples.
References and further reading
- Reading Rockets — The Importance of Teaching Handwriting
- Zaner-Bloser — Handwriting free teaching resources
These links are provided for further reading. External websites and information may change.