Have you ever written two cursive letters perfectly on their own, only to find that they look awkward when you try to connect them?
Maybe the letters in minimum run together, the o in follow creates an unusual gap, or a word that looks beautiful at the beginning becomes difficult to read by the end.
These are common challenges when learning connected handwriting. Knowing the cursive alphabet is one skill. Making individual letters flow naturally into complete words is another.
The good news is that you don't have to memorize every possible two-letter combination. Most cursive joins follow a few familiar movement patterns. Once you understand where one letter ends and the next begins, the connections become easier to recognize and practice.
In this guide, you'll learn how to connect cursive letters step by step, understand high and low joins, practice difficult letter pairs, and develop smoother handwriting with simple exercises.
How Do You Connect Cursive Letters?
To connect cursive letters, use the finishing stroke of one letter to lead into the beginning of the next. This transition is called a cursive join or ligature.
The key is to notice where the first letter finishes.
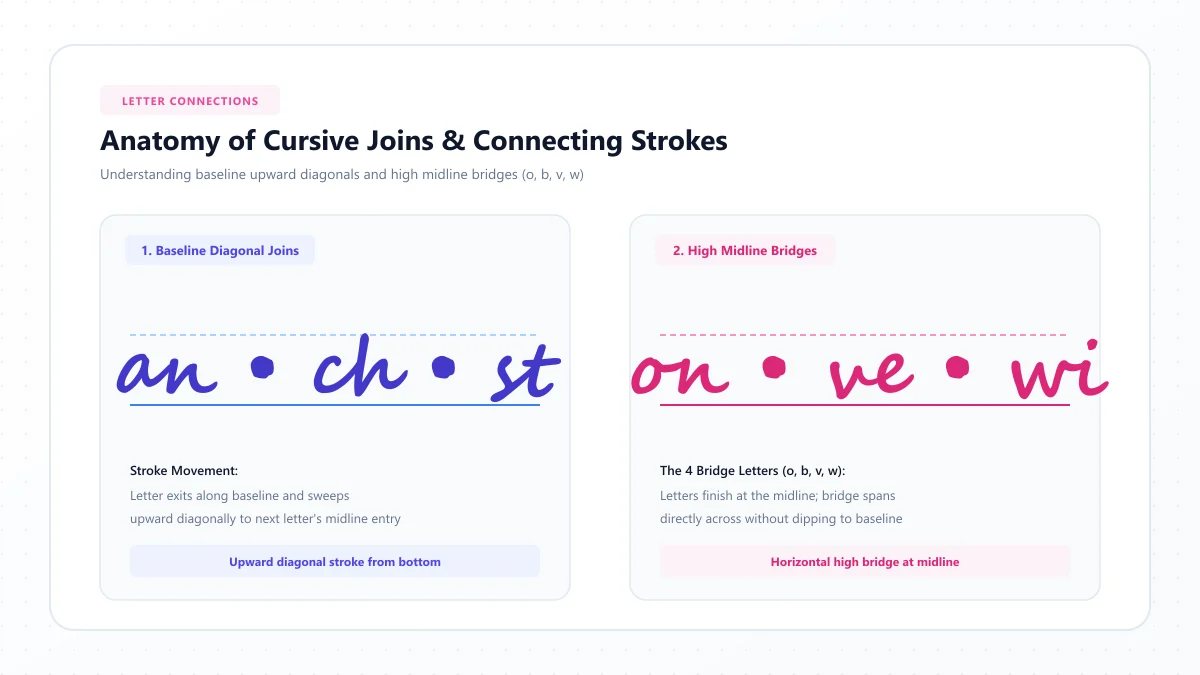
Some lowercase cursive letters finish close to the baseline and lead upward into the next letter. Others, such as certain forms of o, v, w, and r, finish higher and require a different connection.
Here's a simple way to practice:
- Write the first lowercase letter clearly.
- Identify where its exit stroke finishes.
- Look at the beginning of the second letter.
- Move smoothly between the two letters using the correct joining stroke.
- Keep both letter shapes recognizable.
- Practice the connected pair before writing a complete word.
For example, try writing o and n separately. Then write on, using the exit stroke of o to lead naturally into n.
Don't worry about writing quickly. Focus on making the movement comfortable and readable.
Cursive handwriting styles use different letter shapes and joining conventions. The examples in this guide focus on common looped English cursive patterns. Follow your school's handwriting method when it differs.
What Are Cursive Letter Joins?
A cursive letter join is the movement that connects one handwritten letter to the next within a word.
In ordinary printed handwriting, you usually form letters separately. In cursive, many lowercase letters include entry and exit strokes that make it possible to continue writing without starting every character from scratch.
Consider the word cat.
Instead of treating each character as a separate drawing, you write the letters using a connected sequence of movements. The small transitions between letters are just as important as the letters themselves.
A good cursive connection should:
- Preserve the recognizable shape of both letters.
- Follow the letter's intended entry and exit points.
- Keep the spacing between letters consistent.
- Avoid overlapping or unnecessarily closing loops.
- Allow the writing movement to continue comfortably.
The goal isn't to create a perfectly unbroken line at any cost. Some letterforms require pen lifts, and certain handwriting styles deliberately leave particular connections separate.
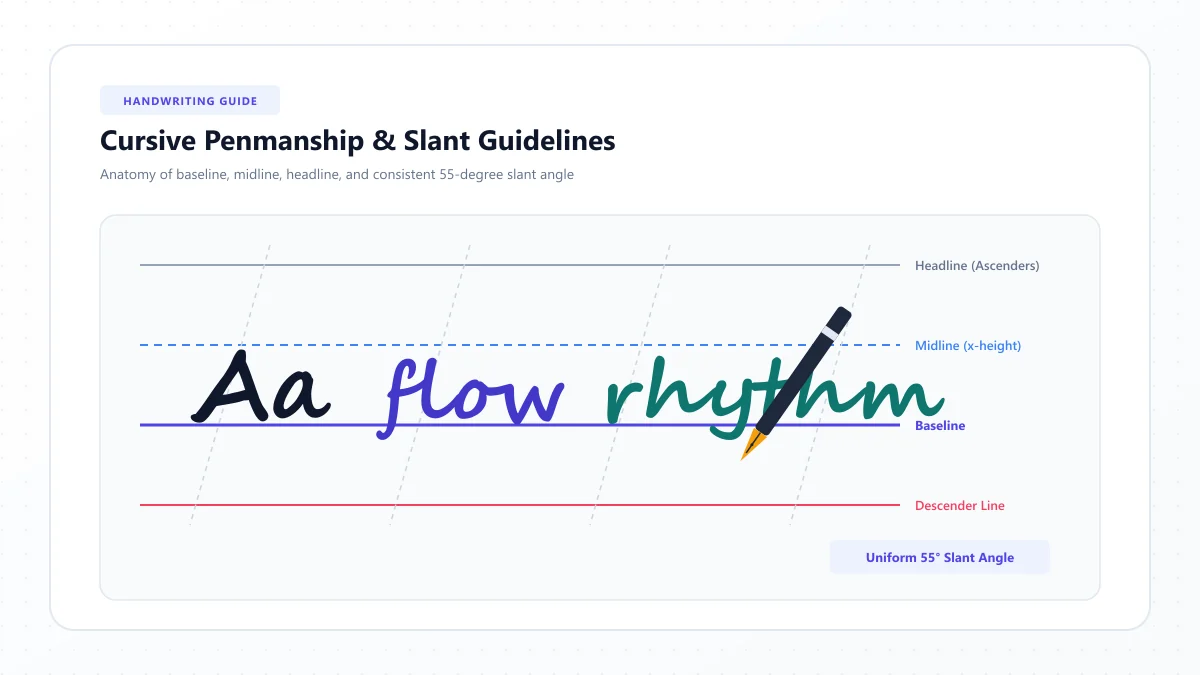
Understanding entry and exit strokes
Two terms are especially useful when learning cursive connections.
Entry stroke: The movement that begins a letter or leads into its main shape.
Exit stroke: The movement that finishes a letter and prepares the hand to move toward the next one.
In a well-connected word, these movements work together.
For example, when writing an, the exit from a can flow toward the entry of n without requiring a large gap.
If the join is too long, the word looks stretched. If it's too short or crowded, the two letters may become difficult to distinguish.
The Main Types of Cursive Letter Connections
Not all cursive joins follow the same path.
In many English-language handwriting methods, you can organize connections into four useful learning categories.
Join type | What happens | Practice examples |
|---|---|---|
Low or baseline joins | The stroke rises from a lower exit into the next letter | an, in, un |
Joins into rounded letters | The connector leads into a curved or oval-based letter | ca, ea, ed |
High joins | A higher letter exit connects toward the next letter | on, oe, we |
Special or interrupted joins | Letterforms require extra control or a pen lift | certain capitals, x forms, descending loops |
The exact path of each join depends on the letterforms you're learning.
1. Low joins: the easiest connections to practice
Low joins, sometimes called bottom joins, are a useful starting point.
They occur when the first letter's finishing movement allows the pen to rise naturally toward the following letter.
Examples include:
- an
- in
- un
- it
- ai
- th
Try writing it slowly.
Complete the lowercase i and continue through its exit stroke toward the beginning of t. Write the main body of t without inserting an unnecessary gap.
Add the dot over i after writing the main connected sequence.
Practice words: in, into, unit, thin, train.
The important skill is maintaining a flowing movement without stretching the connection too far.
2. Joins into rounded or C-shaped letters
Some lowercase letters begin with a rounded movement rather than a simple upward stroke.
Examples include forms of a, c, d, g, and o.
Connecting into these letters requires enough space to form the rounded body clearly.
Practice these combinations:
- ca
- ea
- ed
- na
- ma
- ac
When writing ca, make sure the exit of c leads appropriately into the next letter without collapsing the rounded body of a.
Keep the oval open enough to remain recognizable while respecting the closing stroke used by your particular handwriting method.
Practice words: cat, made, read, candle, magic.
If the letters look crowded, practice the pair separately before writing the complete word.
3. High joins: connections that begin higher
Some cursive letterforms finish near the middle guideline rather than the baseline.
In many common looped cursive models, the letters o, v, w, and r use higher exit strokes.
This changes the movement into the next letter.
For example, the join from o to n in on may leave near the top of the lowercase writing zone.
Instead of dropping all the way back to the baseline, the connection follows the exit intended for that letterform.
Practice:
- on
- or
- oo
- ov
- we
- wi
- br
Then try these words:
one, over, moon, wire, brown
High joins may initially feel less natural because the second letter can begin differently from the way it does when written alone.
Practice tip: Watch the space between the first and second letters. Avoid creating an unwanted loop or excessively long horizontal bridge.
4. Special joins and pen lifts
Some letter combinations require additional attention.
Letters with descenders, crossings, or unusual exit strokes may involve different movements depending on the chosen cursive system.
These can include:
- g followed by another letter
- j followed by a rounded letter
- y followed by a tall letter
- certain forms of f and z
- letters requiring a cross-stroke, such as t and x
Instead of forcing every connection into one pattern, study the particular letterforms you're using.
For example, some versions of lowercase g return from the descending loop toward the baseline and continue into the next letter. Other styles use a different sequence or require a pen lift.
A consistent model is more reliable than trying to join all handwritten styles in exactly the same way.
How to Connect Cursive Letters Step by Step
Let's apply these ideas to a simple word.
We'll use rain because it contains several different movements without being too long for beginners.
Step 1: Write the letters separately
Write:
r a i n
Check that each letter is recognizable.
If one letter is difficult to form, practice it individually before attempting the connections.
Step 2: Identify the exit and entry strokes
Look at the end of r and the beginning of a.
Use the letterforms from your chosen handwriting model to identify how the two strokes should meet.
Next, examine a to i, followed by i to n.
Step 3: Practice one pair
Write ra several times.
Keep the main shapes distinct and the transition short.
Then practice ai and in.
Step 4: Combine the letters
Write the complete word:
rain
Move smoothly from one lowercase letter to the next.
Don't rush the rounded body of a or the final arches of n.
Step 5: Add finishing details
If you're using a handwriting method that adds dots after completing a word, return to dot the i.
Check that the dot sits above the correct letter.
Step 6: Review the result
Ask yourself:
- Can I recognize each letter?
- Are the joins proportional?
- Is there enough space for the oval in a?
- Are the letters sitting consistently on the baseline?
- Does the word look connected without becoming crowded?
Practice the word a few more times, correcting only the part that needs attention.
20 Cursive Letter Pairs to Practice
Once you understand the basic join types, work with short letter combinations.
The following pairs provide a progression from relatively simple transitions to more challenging joins.
Letter pair | Main practice focus | Example word |
|---|---|---|
an | Low connection | and |
in | Rising exit stroke | inside |
un | Repeated undercurve movement | under |
it | Short letter join | little |
ai | Rounded letter to short stroke | rain |
th | Short stroke into taller letter | think |
ch | Curve into tall letter | chair |
sh | Curved form into tall letter | shine |
ea | Joining into an oval | read |
ed | Rounded letter connection | red |
ll | Repeated ascending loops | hello |
ee | Repeated small loops | green |
oo | Two rounded high-exit forms | moon |
on | High connection | one |
or | High exit into r | morning |
ov | High connection between distinct shapes | love |
we | High exit into e | sweet |
br | High exit and r formation | brave |
ing | Repeated movements and descending loop | writing |
ss | Repeated curved forms | lesson |
Choose three or four pairs rather than practicing all 20 in one sitting.
Write each pair several times, then use it in its example word.
Pay attention to how the starting shape of the second letter may change when it is connected.
For the foundational letter shapes, visit our Cursive Letters Directory.
How to Join Difficult Cursive Letter Combinations
Certain letter combinations feel awkward even after you've learned the basic joins.
Here are several common problem areas and how to approach them.
How to connect O to other cursive letters
Lowercase o frequently has a higher exit stroke in looped cursive.
This can make combinations such as oa, on, os, and ov feel different from ordinary baseline connections.
Try this exercise:
Write:
on → one → only
Then:
oo → moon → spoon
Keep the rounded o recognizable. Don't allow the next letter to close its interior or create an unintended extra loop.
How to connect V and W
In handwriting styles with high exits from v and w, the next letter begins from a relatively high connection point.
Practice:
ve, vi, wa, we, wi
Then use these words:
vet, van, wave, will
Keep the transitions compact. A long connecting stroke can make the letters appear separated even though the pen hasn't lifted.
How to connect R and S
Lowercase r and s can be difficult because their cursive forms may look different from their printed versions.
Their entry and exit shapes also vary between handwriting methods.
Try writing:
ra, re, ri, rs, sa, se, si
Follow with:
rose, rice, star, sing
If r resembles s, pause and review its shape before continuing.
If s looks compressed, give its curved body slightly more room.
How to connect letters with descending loops
Letters such as g, j, and y often extend below the baseline.
After creating the descending movement, the writing hand needs to return toward the next letter's entry point.
Practice:
ga, gi, ge, ya, ye, jo
Then try:
game, yard, yellow, joke
Different school styles use different descender shapes. Some connections continue naturally from the loop; others require a separate stroke.
Keep the loop controlled and leave enough space for the next letter.
How to connect double letters
Double letters can become difficult to distinguish if their shapes overlap.
Try:
- ll in bell
- ee in green
- oo in moon
- tt in letter
- ss in lesson
Exercise: Write each pair slowly and make sure both letters remain visible.
In moon, for example, the two ovals should be distinguishable rather than becoming one long rounded shape.
In little, complete the main letters before adding crossbars where appropriate for your chosen style.
Do All Cursive Letters Have to Connect?
No. Although cursive is associated with flowing, connected handwriting, not every character must be written without lifting the pen.
The joining conventions depend on the handwriting method.
Many writers lift their pens to dot i and j, cross t, or complete certain letterforms.
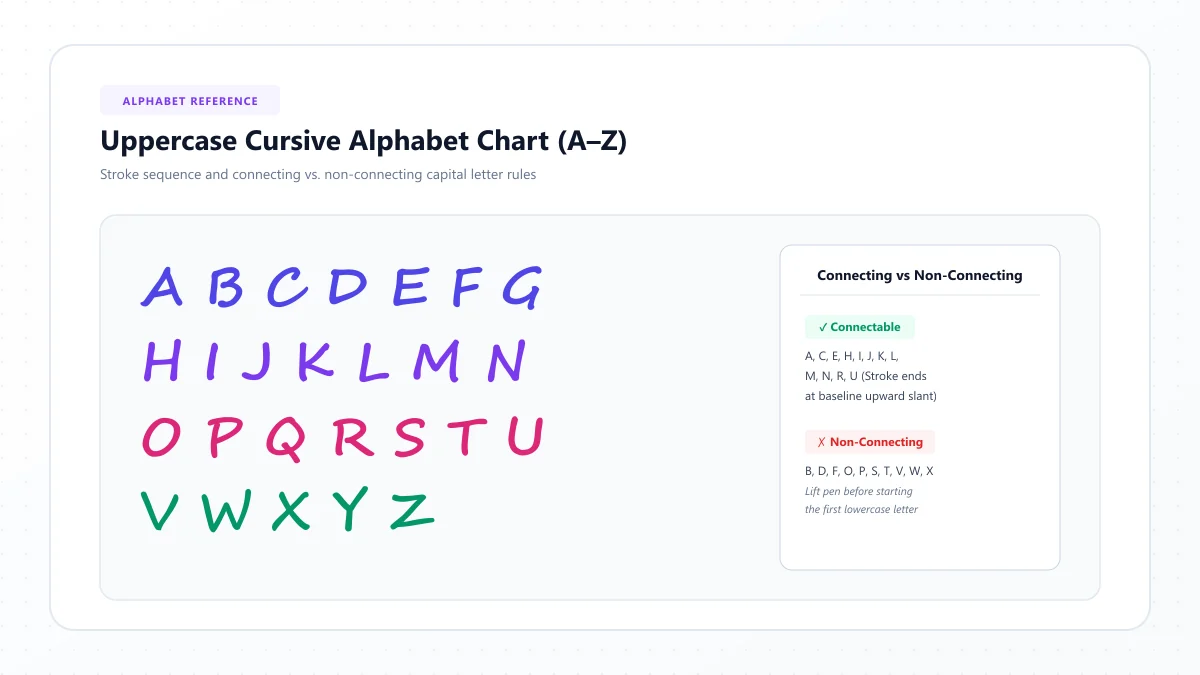
Some uppercase cursive letters also begin separately from the lowercase letters that follow.
The important distinction is between a deliberate pen lift required by the writing style and an accidental break that interrupts a connection.
When should you lift your pen?
A pen lift may be appropriate when:
- Adding dots to i or j.
- Crossing t or completing certain forms of f and x.
- Beginning a capital that doesn't connect in your chosen style.
- Completing a letterform whose instructional sequence requires a lift.
- Moving between separate words.
For many cursive styles, adding dots and crossbars after writing the main word helps preserve a smooth writing rhythm.
However, always follow the stroke sequence for the particular handwriting method you're learning.
Why Do My Cursive Letters Look Messy When Connected?
The problem may not be the letters themselves.
Often, the transition between them changes their shapes or spacing.
Here's how to identify the most common issues.
Problem | Likely cause | Practical correction |
|---|---|---|
Two letters look like one | Joins are too tight | Increase spacing slightly |
Letters look separated | Join is too long or broken | Shorten the transition |
Oval letters become distorted | Connector crosses the oval | Revisit the oval's entry and exit |
High joins look awkward | Pen drops to the wrong entry position | Follow the proper high exit |
Loops overlap | Excessive loop width | Practice smaller, controlled loops |
Double letters merge | Repeated shapes have poor separation | Practice the pair slowly |
Writing becomes uneven | Speed increases too early | Reduce speed and check proportions |
Start by identifying the specific pair that looks wrong.
Instead of rewriting a whole paragraph, isolate the two letters and repeat the connection until the shapes become clearer.
This approach makes it easier to recognize what actually needs improvement.
10 Easy Cursive Joining Exercises
The following exercises move gradually from simple combinations to complete sentences.
Exercise 1: Low-join practice
Write:
an, in, un, it, ai
Focus on smooth transitions and consistent letter height.
Exercise 2: Curved joins
Write:
ca, ea, ed, ma, na
Make sure the rounded letters keep their intended shapes.
Exercise 3: High joins
Write:
on, or, oo, ov, we
Keep the high connecting movements short and controlled.
Exercise 4: Tall letter joins
Write:
th, ch, sh, ll, br
Practice the difference between short letters and letters that extend upward.
Exercise 5: Descending loop joins
Write:
ga, ge, ya, ye, jo
Pay attention to where the descending loop finishes before beginning the next character.
Exercise 6: Double-letter practice
Write:
ll, ee, oo, tt, ss
Check that each pair contains two recognizable letters.
Exercise 7: Short words
Write:
and, rain, love, moon, tree
Concentrate on the movement between the letters rather than writing quickly.
Exercise 8: Medium-length words
Write:
hello, window, flower, yellow, garden
Notice which joins feel less natural and return to those specific pairs.
Exercise 9: Longer words
Write:
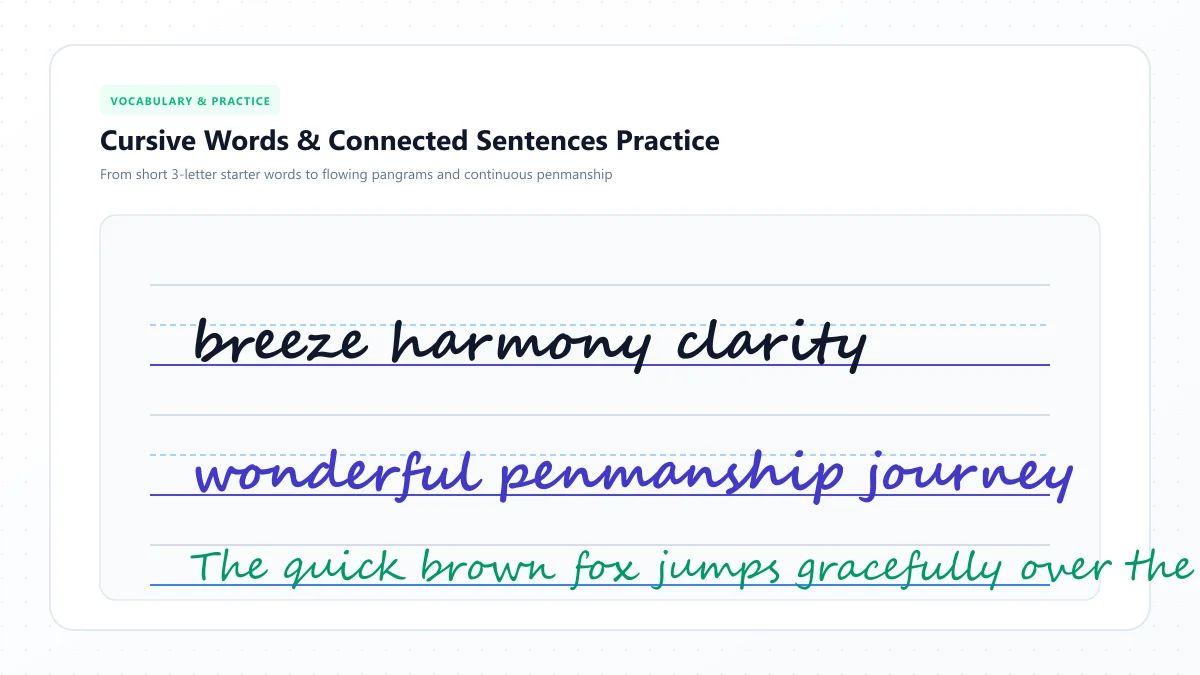
beautiful, handwriting, wonderful, sunshine
Try to maintain consistent letter size and word rhythm from beginning to end.
Exercise 10: Complete sentences
Write:
The quiet rain falls on the green roof.
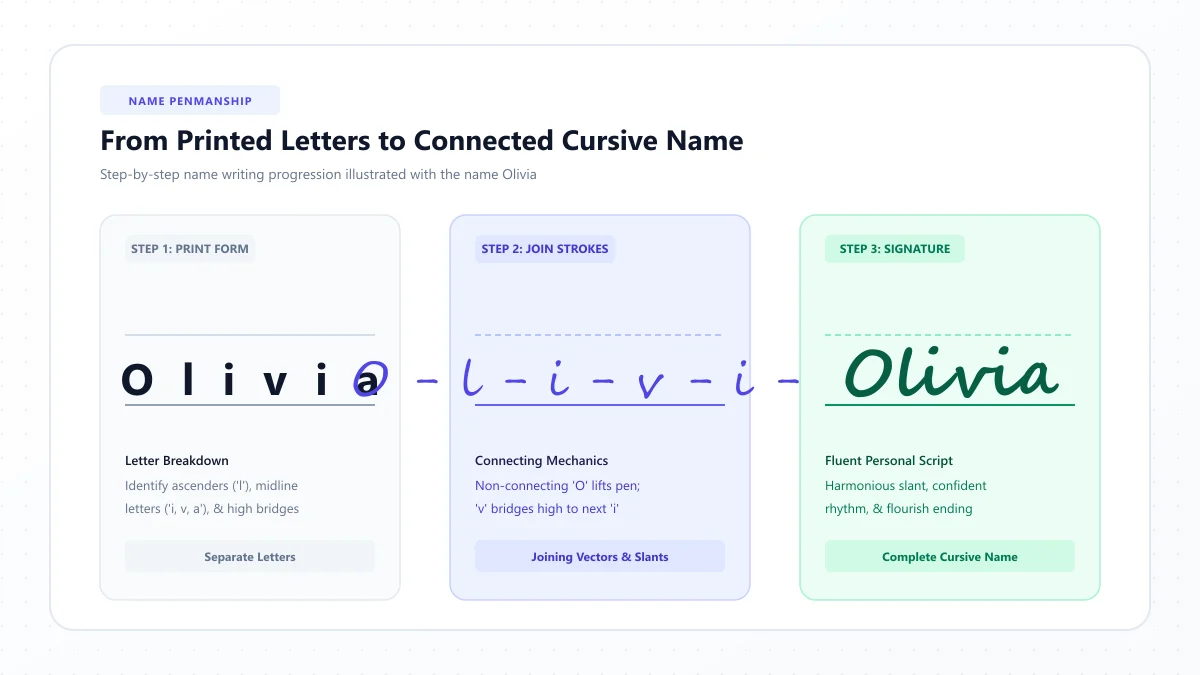
Write your name in cursive with care.
Good handwriting grows with slow practice.
Use lined paper so you can check spacing, slant, and baseline alignment.
Don't worry about completing every exercise in one session.
You can repeat the drills that target your most difficult connections.
A 7-Day Cursive Letter Joining Practice Plan
If you're learning to connect cursive letters for the first time, a structured practice routine can help.
Day | Main focus | Suggested exercises |
|---|---|---|
Day 1 | Entry and exit strokes | Write individual letters and identify their exits |
Day 2 | Low joins | Practice an, in, un, it, and ai |
Day 3 | Rounded joins | Practice ca, ea, ed, and related words |
Day 4 | High joins | Practice on, or, oo, ov, and we |
Day 5 | Difficult combinations | Practice r, s, and descending-loop joins |
Day 6 | Double letters and words | Practice hello, moon, green, and little |
Day 7 | Sentences and review | Write three sentences and review weak connections |
Keep your sessions short enough to maintain comfortable, focused writing.
Seven days is an introductory routine, not a guarantee of mastery. Repeat any section that still feels difficult.
How to Teach Cursive Letter Connections to Kids
For children, joining letters can feel like a new skill even when they already know the full alphabet.
One useful approach is to teach a small number of connected pairs before expecting a child to write long words.
Start with combinations such as:
at, in, on, it, an
Demonstrate the movement and explain where the first letter finishes.
Then let the child trace the pair, copy it, and finally write it independently.
Keep feedback specific
Instead of saying "make your writing neater," explain what needs changing.
For example:
"The two letters are clear, but the line between them is too long. Let's make the joining stroke shorter."
Use familiar words
Children may enjoy practicing words such as:
cat, dog, mom, sun, ball
Choose words containing joins they've already learned.
If a child uses a particular handwriting curriculum at school, keep the practice examples consistent with that curriculum's letterforms.
How Adults Can Improve Cursive Letter Connections
Adults often have a slightly different problem.
You may remember how to form the letters but find that your handwriting becomes crowded when you write quickly.
The best starting point is to isolate the connections that repeatedly cause trouble.
Write a short paragraph in your normal cursive handwriting.
Look for words where:
- The letters run into each other.
- Your o, v, or w connects awkwardly.
- Tall and descending loops overlap.
- Repeated letters become difficult to distinguish.
Choose three examples from your own writing.
Practice those combinations slowly before returning to the paragraph.
This targeted approach can be more useful than relearning every letter from the beginning.
Can a Cursive Text Generator Teach Letter Connections?
A digital cursive text generator and physical cursive handwriting practice are related but different activities.
An online generator can show how words look in script-style typography.
However, many copyable cursive characters are Unicode symbols. They don't necessarily represent the real pen movements used in handwritten cursive.
Our Cursive Text Generator is useful for exploring digital lettering styles and creating copyable text.
For handwriting references, visit the Cursive Alphabet Chart and Cursive Letters Directory.
To learn the physical movements needed for connecting letters, use handwritten stroke demonstrations and guided practice rather than copying decorative Unicode character shapes.
Frequently Asked Questions About Connecting Cursive Letters
How do you join two letters in cursive?
Use the exit stroke of the first letter to lead into the entry stroke of the next. Follow the joining convention of your selected handwriting style, keeping both letterforms recognizable.
What are low joins in cursive?
Low joins are connections that begin from a lower exit position, typically near the baseline, and rise toward the next letter. Examples in common looped cursive styles include an, in, and un.
What are high joins in cursive?
High joins occur when a letter finishes higher on the writing line. Certain forms of b, o, v, and w commonly use higher exits, so combinations such as on, ov, and we require a different joining movement.
Which cursive letters are difficult to connect?
Difficulty varies, but learners often need extra practice with high-exit letters, forms of r and s, descending loops, and repeated letters such as oo, ll, and ss.
Do cursive capital letters connect to lowercase letters?
Sometimes. Many traditional capital forms are written separately from the following lowercase letter, while others have connecting strokes. The rules depend on the handwriting system.
Do you lift your pen when writing cursive?
Yes, when the letterform or writing method requires it. For example, writers often lift their pens to dot i and j, cross t, or complete certain other letters.
How can I stop cursive letters from running together?
Practice each difficult letter pair separately, keep the connecting strokes proportional, maintain consistent letter sizes, and avoid rushing. Use lined paper to check alignment.
What is the best way to practice cursive joins?
Start with easy two-letter combinations, progress to difficult joins, and then use those connections in complete words and sentences. Review your writing and repeat only the combinations that need attention.
Can you learn cursive connections without worksheets?
Yes. You can practice with lined paper and reliable handwritten letter models. Worksheets can make guided practice easier, but they aren't essential.
Is connected cursive handwriting always faster than print?
Not necessarily. Connected writing may require fewer pen lifts, but actual speed depends on the writer's skill, handwriting style, and practice. Readability and comfort should come before speed.
Final Thoughts: Make Every Cursive Connection Count
Learning how to connect cursive letters is about understanding the small movements between recognizable letterforms.
Start with easy low joins, move to rounded and high connections, and give difficult pairs a little extra attention.
Don't force every letter to connect in the same way. Different cursive styles use different entry strokes, exits, and pen lifts.
With consistent practice, you'll become more comfortable moving from individual letters to words and complete sentences.
For additional learning resources, explore our Cursive Letters Directory, reference the Cursive Alphabet Chart, or experiment with visual script styles through the Cursive Text Generator.
References and further reading
- Reading Rockets — The Importance of Teaching Handwriting
- Learning Without Tears — handwriting curriculum publisher
These links are provided for further reading. External websites and information may change.