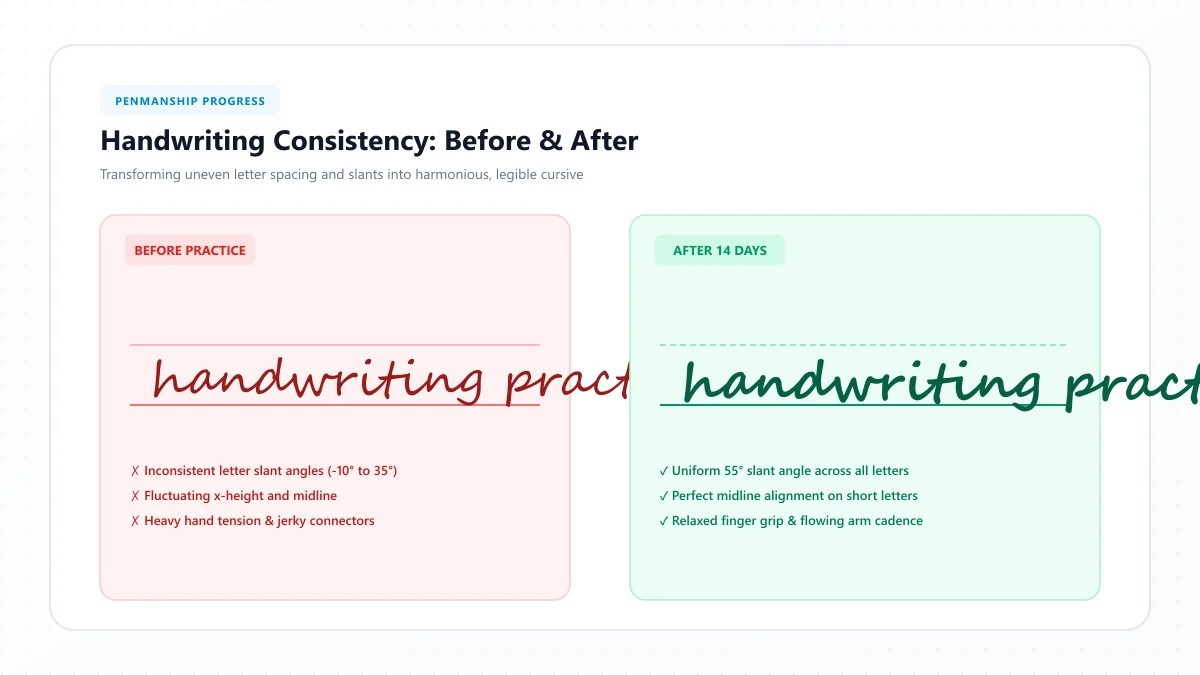
Does your cursive handwriting look beautiful when you slow down but become messy the moment you write a full sentence? Maybe some of your letters lean in different directions, your loops get tangled, or words that look perfectly clear in your head are difficult to read on paper.
You're not alone in finding those details challenging.
The encouraging thing about cursive is that you don't have to change your entire handwriting style to improve it. Often, a few adjustments to letter size, spacing, pressure, and movement can make your writing noticeably more consistent.
If you're wondering how to improve your cursive handwriting, this guide will help you identify what needs attention and choose practical exercises to work on it.
You'll find 15 straightforward tips, a handwriting self-assessment, real practice words, and a seven-day improvement routine for students and adults.
How Can You Improve Cursive Handwriting Quickly?
The best place to start is by identifying one specific problem with your handwriting rather than trying to make every letter look perfect.
Write a short paragraph in your usual cursive style. Then look for uneven letter sizes, inconsistent slant, awkward connections, crowded words, or excessive pressure.
Once you've identified the biggest issue, practice an exercise that directly addresses it.
For a simple starting routine:
- Write a short handwriting sample and identify one problem.
- Adjust your paper position and relax your grip.
- Practice basic curves and loops for two minutes.
- Repeat a few words that contain your difficult letters.
- Write one sentence slowly, focusing on the problem you've chosen.
- Compare your new writing with your original sample.
- Repeat the exercise regularly before increasing your writing speed.
You may notice small improvements during a single session. Developing consistently better handwriting usually takes repeated, attentive practice.
The goal is not to copy someone else's handwriting perfectly. It's to develop a cursive style that feels comfortable, flows naturally, and remains easy to read.
Why Does Cursive Handwriting Look Messy?
Cursive involves more than forming individual letters. You're also managing the spacing, direction, and movement between them.
That means handwriting can look uneven even when you already know how to write every letter.
Here are five common problems:
Handwriting problem | Possible cause | What to practice |
|---|---|---|
Letters lean in different directions | Inconsistent writing movement or paper position | Slant consistency |
Some letters are much larger than others | Unstable letter proportions | Guided line exercises |
Words look crowded | Poor letter or word spacing | Spacing drills |
Loops overlap or become tangled | Uncontrolled loop width or connections | Slow loop practice |
Writing gets worse after a few lines | Fatigue, pressure, or rushing | Comfortable grip and shorter sessions |
Before changing anything, look at a complete sentence you've written naturally.
You don't need to fix all five problems. Start with the one that makes your handwriting hardest to read.
15 Easy Tips to Improve Your Cursive Handwriting
These techniques focus on the areas that most directly affect legibility, consistency, and writing comfort.
1. Start by Identifying Your Biggest Handwriting Problem
One of the most useful things you can do is examine your writing before practicing.
Write this sentence in your natural cursive handwriting:
The quick brown fox jumps over the lazy dog.
Don't try to make it unusually neat. Write the way you normally would.
Now ask yourself:
- Are the lowercase letters approximately the same height?
- Do the tall letters lean in a similar direction?
- Can you distinguish individual words easily?
- Are the loops open and recognizable?
- Do the letter connections look smooth?
Choose one issue.
For example, if your letters are different sizes, spend your next practice session on letter height rather than trying to improve speed, loops, and spacing at the same time.
Try this: Circle the three letters or connections that look least consistent. Practice those shapes separately, then write the sentence again.
2. Use Lined Paper to Control Letter Height
Inconsistent letter height is one reason cursive handwriting can appear untidy.
If your lowercase a is almost as tall as l, or your o changes size throughout a word, the writing loses its visual rhythm.
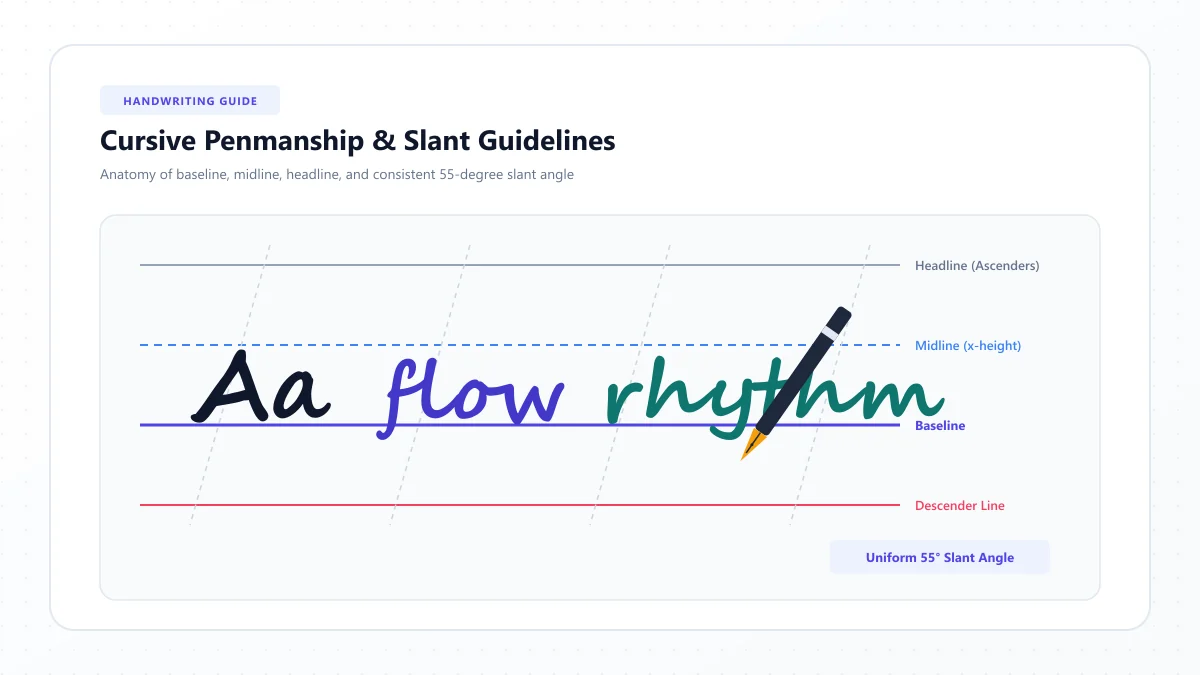
Handwriting guidelines help you recognize the different writing zones.
Short lowercase letters such as a, c, e, m, and o generally occupy the middle writing zone.
Tall lowercase letters such as b, f, h, and l extend upward.
Letters such as g, p, and y typically extend below the baseline.
Exercise: Write the word minimum five times on lined paper.
Try to keep the short letters the same height and the repeated strokes evenly spaced.
Next, practice little and light, checking the proportions of the taller and descending letters.
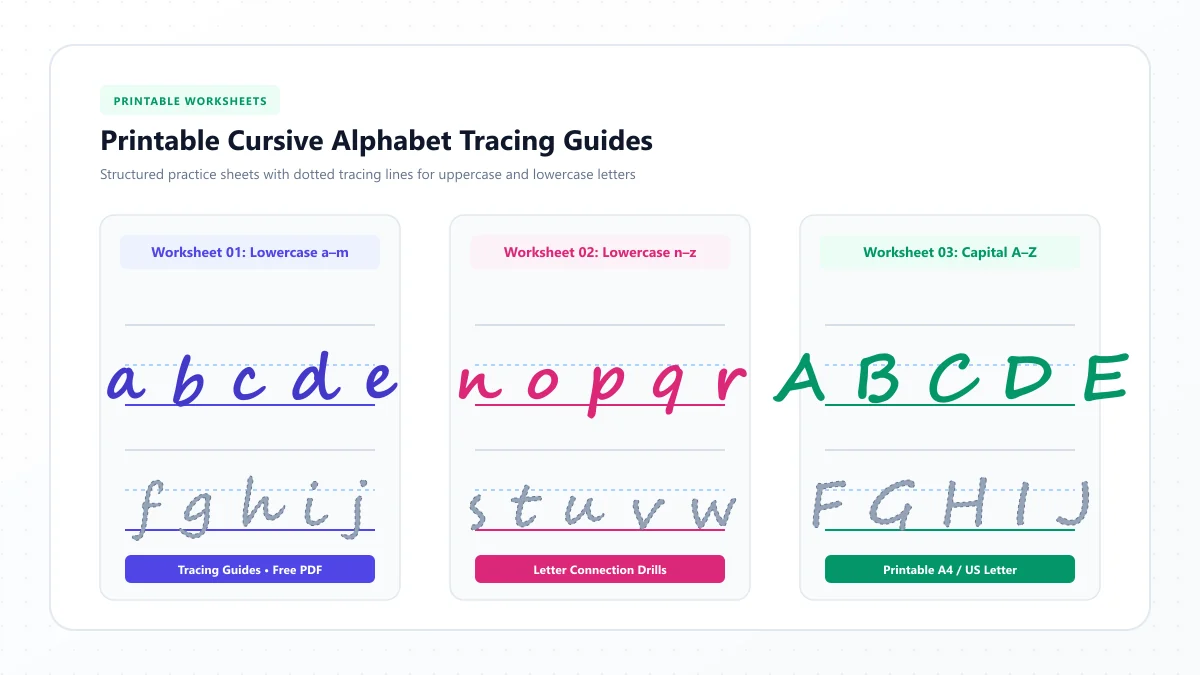
For additional guided practice, use your printable cursive handwriting worksheets.
3. Keep Your Letter Slant Consistent
Cursive handwriting often uses a slight slant, but the exact angle depends on the writing style and the person.
You don't need to force every letter to lean at a specific number of degrees.
What matters more is consistency.
If one letter leans strongly to the right and the next stands upright, the word may look uneven.
Exercise: Draw several lightly slanted parallel guidelines on a sheet of paper.
Write:
minimum, minimum, minimum
Compare the main downward strokes with your guidelines.
A comfortable, consistent slant is usually more helpful than a dramatic angle that makes writing difficult.
4. Relax Your Pen Grip
Holding a pen too tightly can make writing feel stiff and tiring.
When you're concentrating on making each letter perfect, it's easy to grip the pen harder without noticing.
Try holding your pen securely but gently.
Your grip should allow the pen to move without slipping, while avoiding unnecessary tension in your fingers.
Different writers use different functional grips. You don't need to force one exact finger position if your current grip is comfortable and effective.
Exercise: Write the word moon three times.
After each repetition, pause and notice whether your fingers, thumb, or wrist feel tense.
If they do, loosen your grip slightly and try again.
The goal is controlled movement, not pressing harder.
5. Adjust Your Paper Position
A small change in the angle of your notebook can make certain cursive strokes feel easier.
Place the paper where your writing hand can travel naturally across the page.
Right-handed and left-handed writers may prefer different paper angles. There is no single position that works for everyone.
Keep your shoulders relaxed and use your non-writing hand to steady the page when needed.
Exercise: Write the word hello with the paper positioned straight in front of you.
Then try a modest change in the paper's angle.
Choose the position that makes your writing feel most comfortable while maintaining a consistent baseline.
Avoid twisting your wrist or leaning uncomfortably just to create a particular slant.
6. Practice Basic Cursive Strokes Again
Even if you already know every cursive letter, reviewing fundamental movements can help improve control.
Several letter shapes are built from similar strokes:
- Undercurves
- Overcurves
- Ovals
- Ascending loops
- Descending loops
Start by drawing a line of smooth undercurves.
Then practice rounded ovals, followed by taller loops.
Keep the movements steady and the shapes reasonably consistent.
Two-minute drill:
Spend 30 seconds on undercurves, 30 seconds on overcurves, 30 seconds on ovals, and 30 seconds on loops.
Afterward, write the word welcome and see whether the movements feel easier.
For a complete introduction to letter formation, use the separate beginner guide, How to Write in Cursive: A Complete Beginner’s Guide.
7. Make Your Loops Smaller and More Controlled
Big loops can look decorative, but oversized loops may make ordinary handwriting crowded.
If the upper loop of your l overlaps nearby letters, or the descending loop of g collides with the next line, the writing becomes harder to read.
Start with simple, narrow loops that have enough interior space to remain recognizable.
You can increase their size later if you prefer a more expressive handwriting style.
Exercise: Practice these words:
high, gulf, young
Focus on the letters that extend above or below the main writing area.
Check that your loops don't overlap the letters beside them.
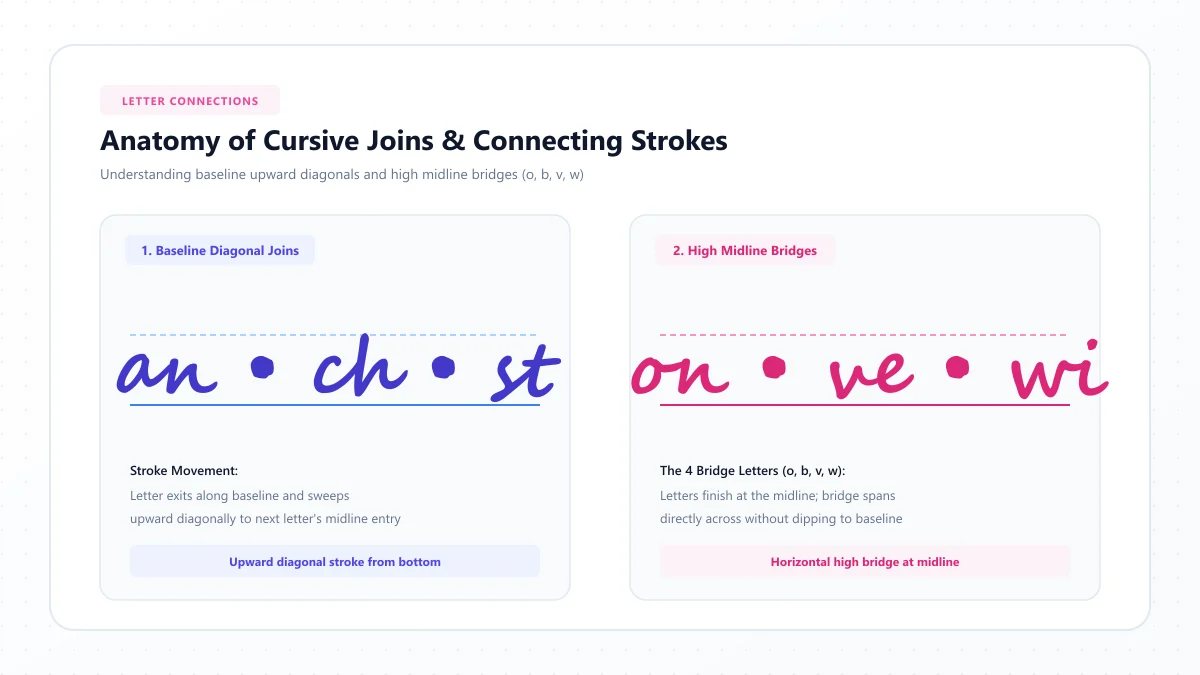
8. Improve the Connections Between Letters
A word can contain beautifully formed individual letters and still look awkward if the joins between them are uneven.
Some cursive letters connect near the baseline, while others finish higher.
For example, the connection after o may differ from the connection after a, depending on the cursive method you're using.
Rather than forcing every pair to connect the same way, pay attention to where one letter ends and the next begins.
Exercise: Write these pairs slowly:
on, ov, it, ai, al
Then practice complete words:
one, oven, sail, mail
If a particular pair looks awkward, write the two letters separately and study their entry and exit strokes.
Practice the join before returning to the complete word.
Not every cursive method connects every letter in exactly the same way, so follow a consistent instructional model.
9. Give Each Word Enough Space
Even neatly shaped cursive letters can become difficult to read when words are crowded together.
Word spacing helps readers recognize where one word ends and the next begins.
As a general visual guide, the space between words should be clearly greater than the small spaces within connected letters.
You don't need to measure the gaps with a ruler. Consistency matters more than a mathematically exact distance.
Exercise: Write this sentence:
The sun is warm today.
Look at the four spaces between the words.
Are they easy to identify?
Rewrite the sentence, keeping the word gaps more consistent.
10. Slow Down Before Trying to Write Faster
When you rush, letters may become compressed, loops may close, and connections may disappear.
That doesn't mean fast cursive is always messy. Experienced writers can develop fluent, quick handwriting.
But speed works best when your letter formation is already reliable.
If your cursive becomes less readable when you're taking quick notes, practice at a pace where you can still control the shapes.
Exercise: Write:
Good writing takes daily practice.
First, write it at your usual speed.
Next, write it deliberately and slowly.
Compare the two versions.
Find the point where increasing your speed begins to reduce legibility, and practice just below that pace.
11. Keep Your Baseline Steady
If your words drift upward or downward across the page, the sentence can appear uneven even when its letters look fine.
The baseline is the imaginary or printed line on which most letters rest.
Using ruled paper makes it easier to see whether your writing follows a consistent path.
Exercise: Write three lines of the sentence:
The little yellow balloon flew away.
Keep the main bodies of the words aligned with the baseline.
If you notice that your writing rises toward the end of each line, slow down and check your page position.
12. Focus on Difficult Letters Instead of Repeating the Whole Alphabet
If most of your letters already look good, rewriting A–Z every day may not be the most efficient use of your practice time.
Identify the letters that regularly cause problems.
For example:
- If r resembles n, practice their distinctive shapes.
- If e closes too tightly, practice opening its small loop.
- If s becomes difficult to recognize, review its formation.
- If g or y has an uncontrolled tail, focus on descending loops.
Exercise: Choose your three most difficult lowercase letters.
Write each one five times, followed by three words containing that letter.
Then write a sentence using at least two of the words.
This moves your practice from isolated shapes back into useful handwriting.
Our Cursive Letters Directory provides individual A–Z references if you need to review particular forms.
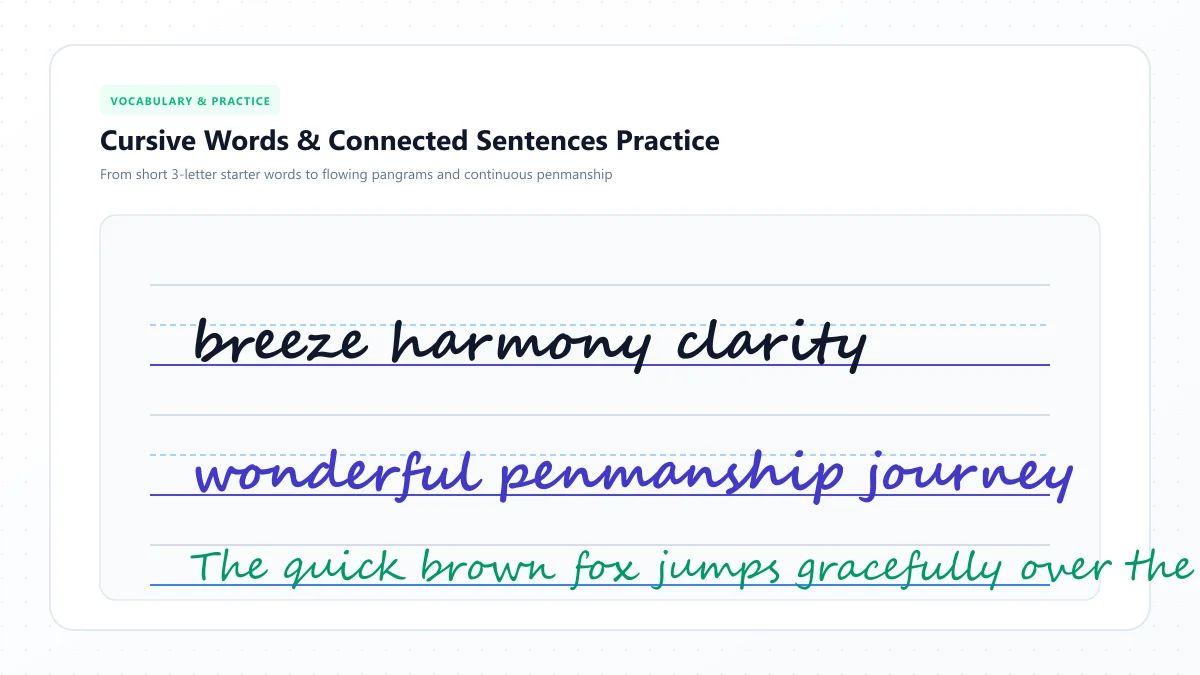
13. Practice With Real Words and Sentences
Rows of individual letters are helpful when correcting a shape, but everyday cursive involves whole words.
Practicing meaningful sentences lets you work on letter connections, word spacing, rhythm, and readability together.
Choose sentences you might actually write.
For example:
I need to buy milk tomorrow.
My meeting starts at nine.
Thanks for your help last week.
Exercise: Write one sentence three times.
On the first attempt, focus on letter size.
On the second, focus on spacing.
On the third, try to combine both improvements without rushing.
This is more targeted than copying several pages without paying attention to what you're changing.
14. Build a Short, Consistent Practice Habit
Long handwriting sessions aren't necessary for everyone.
A manageable routine makes it easier to practice regularly and pay attention to mistakes.
You could use a 10-minute session with the following structure:
- Two minutes of curves and loops
- Three minutes of difficult letters and connections
- Three minutes of words and sentences
- Two minutes reviewing your writing
If ten minutes is too much on a particular day, shorten the session.
What matters is practicing carefully rather than simply filling the page.
You can use lined paper, a notebook, or suitable cursive handwriting worksheets.
15. Track Your Progress With Weekly Writing Samples
It's difficult to recognize improvements when you compare your handwriting only from one day to the next.
Try keeping a short weekly sample.
Write the same sentence using your natural cursive style:
The quick brown fox jumps over the lazy dog.
This sentence includes every letter of the English alphabet, giving you a broad selection of shapes to review.
Date each sample and save it.
After a few sessions, compare:
- Letter size
- Slant consistency
- Word spacing
- Loop formation
- Overall readability
- Comfort and effort while writing
You may notice that one part of your handwriting has improved while another still needs attention.
Use those observations to decide what to practice next.
The aim is visible, useful progress, not perfect handwriting.
A Quick Cursive Handwriting Self-Assessment
Before beginning your improvement routine, evaluate a short paragraph you've written.
Rate each feature from 1 to 5, where 1 means it needs significant attention and 5 means it is consistently good.
Feature | What to check | Score |
|---|---|---|
Letter size | Short and tall letters have consistent proportions | /5 |
Slant | Main strokes lean in a consistent direction | /5 |
Letter connections | Joins look smooth and recognizable | /5 |
Word spacing | Words are clearly separated | /5 |
Baseline | Writing stays reasonably aligned | /5 |
Readability | Another reader can recognize the words | /5 |
Total: /30
This is an informal practice checklist, not a standardized handwriting assessment.
Rather than treating the total as a grade, look at which category received your lowest score.
For example, if your word spacing receives 2/5 but letter size receives 5/5, you'll probably benefit more from spacing exercises than from repeating individual letters.
Best Cursive Handwriting Exercises for Neater Writing
Once you know which part of your cursive needs improvement, choose exercises that address it.
Exercise 1: The Minimum Drill
Write:
minimum
This word contains repeated short movements that make inconsistent height, spacing, or slant easier to notice.
Use it to practice even proportions.
Exercise 2: The Loop Drill
Write:
loop, hill, gulf
These words contain useful combinations of ascending or descending letterforms.
Check that your loops stay open, controlled, and proportionate.
Exercise 3: The Oval Drill
Write:
moon, go, open
Focus on making rounded letter shapes recognizable and reasonably consistent.
Exercise 4: The Connection Drill
Write:
an, on, in, it
Pay attention to how each letter transitions into the next.
If one connection feels awkward, practice the two-letter combination separately.
Exercise 5: The Sentence Drill
Write:
The quick brown fox jumps over the lazy dog.
Use this sentence to review overall balance, spacing, slant, and line alignment.
Choose only one or two aspects to improve in each repetition.
A 7-Day Plan to Improve Your Cursive Handwriting
If you want a structured routine, use this seven-day plan to work through the most common handwriting problems.
Day | Focus | Exercise |
|---|---|---|
Day 1 | Handwriting assessment | Write and review a sample paragraph |
Day 2 | Letter size | Practice minimum, little, and writing |
Day 3 | Slant and baseline | Write short phrases on lined paper |
Day 4 | Loops and curves | Practice hello, yellow, cocoa, and good |
Day 5 | Letter connections | Work on difficult letter pairs and words |
Day 6 | Spacing and rhythm | Copy three short sentences carefully |
Day 7 | Progress review | Rewrite the Day 1 sample and compare |
Treat this as an introduction to improvement, not a guaranteed seven-day transformation.
You may need several sessions to improve a particular habit. Repeat whichever day addresses your biggest difficulty.
How to Make Cursive Handwriting Look Beautiful Without Losing Readability
Beautiful cursive isn't necessarily the most elaborate handwriting.
A simple style with consistent letter proportions, comfortable spacing, and smooth movement can be attractive without using exaggerated loops or decorative flourishes.
If you want a more elegant look, experiment with small, controlled changes.
You might slightly lengthen your ascenders, give rounded letters more space, or make your capital letters a little more expressive.
Keep the letterforms recognizable.
A capital letter with an elaborate flourish can look attractive on a greeting card, but the same decoration may make everyday notes harder to read.
For inspiration, explore our Cursive Alphabet Chart to see letter shapes and compare uppercase and lowercase forms.
You can also experiment with digital script styles using the Cursive Text Generator. These are useful for visual inspiration, although decorative Unicode text isn't a substitute for physical handwriting practice.
How to Improve Cursive Handwriting as an Adult
Adults sometimes approach handwriting improvement differently from children.
You may already know the cursive alphabet but have developed habits that make your writing difficult to read.
Instead of starting every lesson from the beginning, work on the specific movements that cause problems.
Use words you write regularly
Practice your name, common greetings, work-related notes, and familiar phrases.
This makes the exercise relevant to everyday writing.
Don't force yourself to copy a schoolchild's handwriting exactly
Your cursive can remain personal.
Focus on readable letterforms, consistent movement, and comfort rather than trying to reproduce every feature of a particular handwriting model.
Check for hand fatigue
If your writing becomes uncomfortable, take breaks and adjust your supplies or writing position.
Persistent pain, numbness, or difficulty controlling a pen deserves advice from an appropriate healthcare professional rather than simply more practice.
How to Help Kids Improve Their Cursive Handwriting
Children learning cursive may benefit from more guided practice and feedback.
Start by checking whether they understand how to form the letter rather than only whether the finished shape looks correct.
A child who repeatedly starts a stroke in the wrong place may need a clear directional example, not another page of independent copying.
Try short activities such as practicing their first name, writing a favorite word, or copying one sentence neatly.
Give specific feedback:
"These letters are all sitting on the baseline. Now let's make the spaces between the words a little clearer."
Avoid making every handwriting session a test of perfection.
Different learners develop handwriting skills at different rates, and the most appropriate approach depends on their age, motor skills, and classroom instruction.
How Long Does It Take to Improve Cursive Handwriting?
There's no universal timeline.
Some people notice a small improvement in spacing or slant as soon as they begin paying closer attention.
Other changes, particularly those involving familiar writing habits, may take longer to become consistent.
Your progress depends on your starting point, your goals, and how you practice.
A more useful measure than the number of days is whether you can write increasingly readable sentences without concentrating on every individual movement.
Compare weekly writing samples and continue practicing the features that need attention.
Frequently Asked Questions
What is the fastest way to improve cursive handwriting?
Identify the most noticeable problem in your writing and practice an exercise that specifically addresses it. Correcting inconsistent letter size, spacing, or joins is often more useful than repeatedly copying the entire alphabet.
How can I make my cursive handwriting neater?
Use lined paper, keep letter sizes consistent, practice clear connections, leave enough space between words, and slow down when writing becomes difficult to read. Review your work regularly to identify specific improvements.
Can adults improve their cursive handwriting?
Yes. Adults can work on letter formation, spacing, slant, writing comfort, and fluency. They don't necessarily need to relearn the entire alphabet if they already understand the basics.
Does writing slowly help improve cursive?
Slowing down can help you pay attention to letter shapes and correct mistakes. Once your movements become more consistent, you can gradually increase your speed while maintaining readability.
What words are good for cursive handwriting practice?
Words such as minimum, little, love, moon, gulf, and young offer opportunities to practice repeated strokes, loops, ovals, and letter connections.
How can I improve my cursive slant?
Use a comfortable paper position and practice repeated strokes on lightly slanted guidelines. Aim for consistency rather than trying to force one exact angle.
Why does my cursive handwriting get messy when I write fast?
Writing faster can reduce the time you spend controlling each letter shape. Your spacing may narrow, loops may become compressed, and joins may lose definition. Practice at a manageable speed before gradually writing faster.
Should cursive handwriting always lean to the right?
No. Many traditional cursive styles use a rightward slant, but handwriting styles and personal preferences vary. Consistent, comfortable, readable writing is more important than following one mandatory slant.
Is cursive handwriting better with a pen or pencil?
Both can work. Choose a writing tool that feels comfortable, moves smoothly, and doesn't require excessive pressure. Beginners may appreciate the ability to erase pencil marks, while others prefer a pen.
Can cursive worksheets help improve handwriting?
Yes. Well-designed worksheets can provide useful letter models and guidelines for practicing consistent proportions. They work best when paired with correct stroke instruction and independent writing practice.
Final Thoughts: Better Cursive Starts With Better Practice
Improving cursive handwriting isn't about making every letter look like a piece of calligraphy.
It's about learning to recognize what makes your writing difficult to read and making small, deliberate adjustments.
Start with one problem. Practice a useful exercise. Compare your writing, and build on what improves.
Over time, a combination of clear letter shapes, comfortable movement, consistent spacing, and patient practice can help your cursive feel more natural.
For extra support, explore our Cursive Letters Directory, review the Cursive Alphabet Chart, or use our Cursive Text Generator for digital script-style inspiration.
References and further reading
- Reading Rockets — The Importance of Teaching Handwriting
- Understood.org — How to help your child with writing
These links are provided for further reading. External websites and information may change.